Comparing laps
Two laps from one session on one distance axis: where the second gains on the first, metre by metre, with the channels underneath to say why. The divergence is the headline; everything else on the page serves it.
Last verified against build f98a29e · 2026-09-06
Selecting two laps
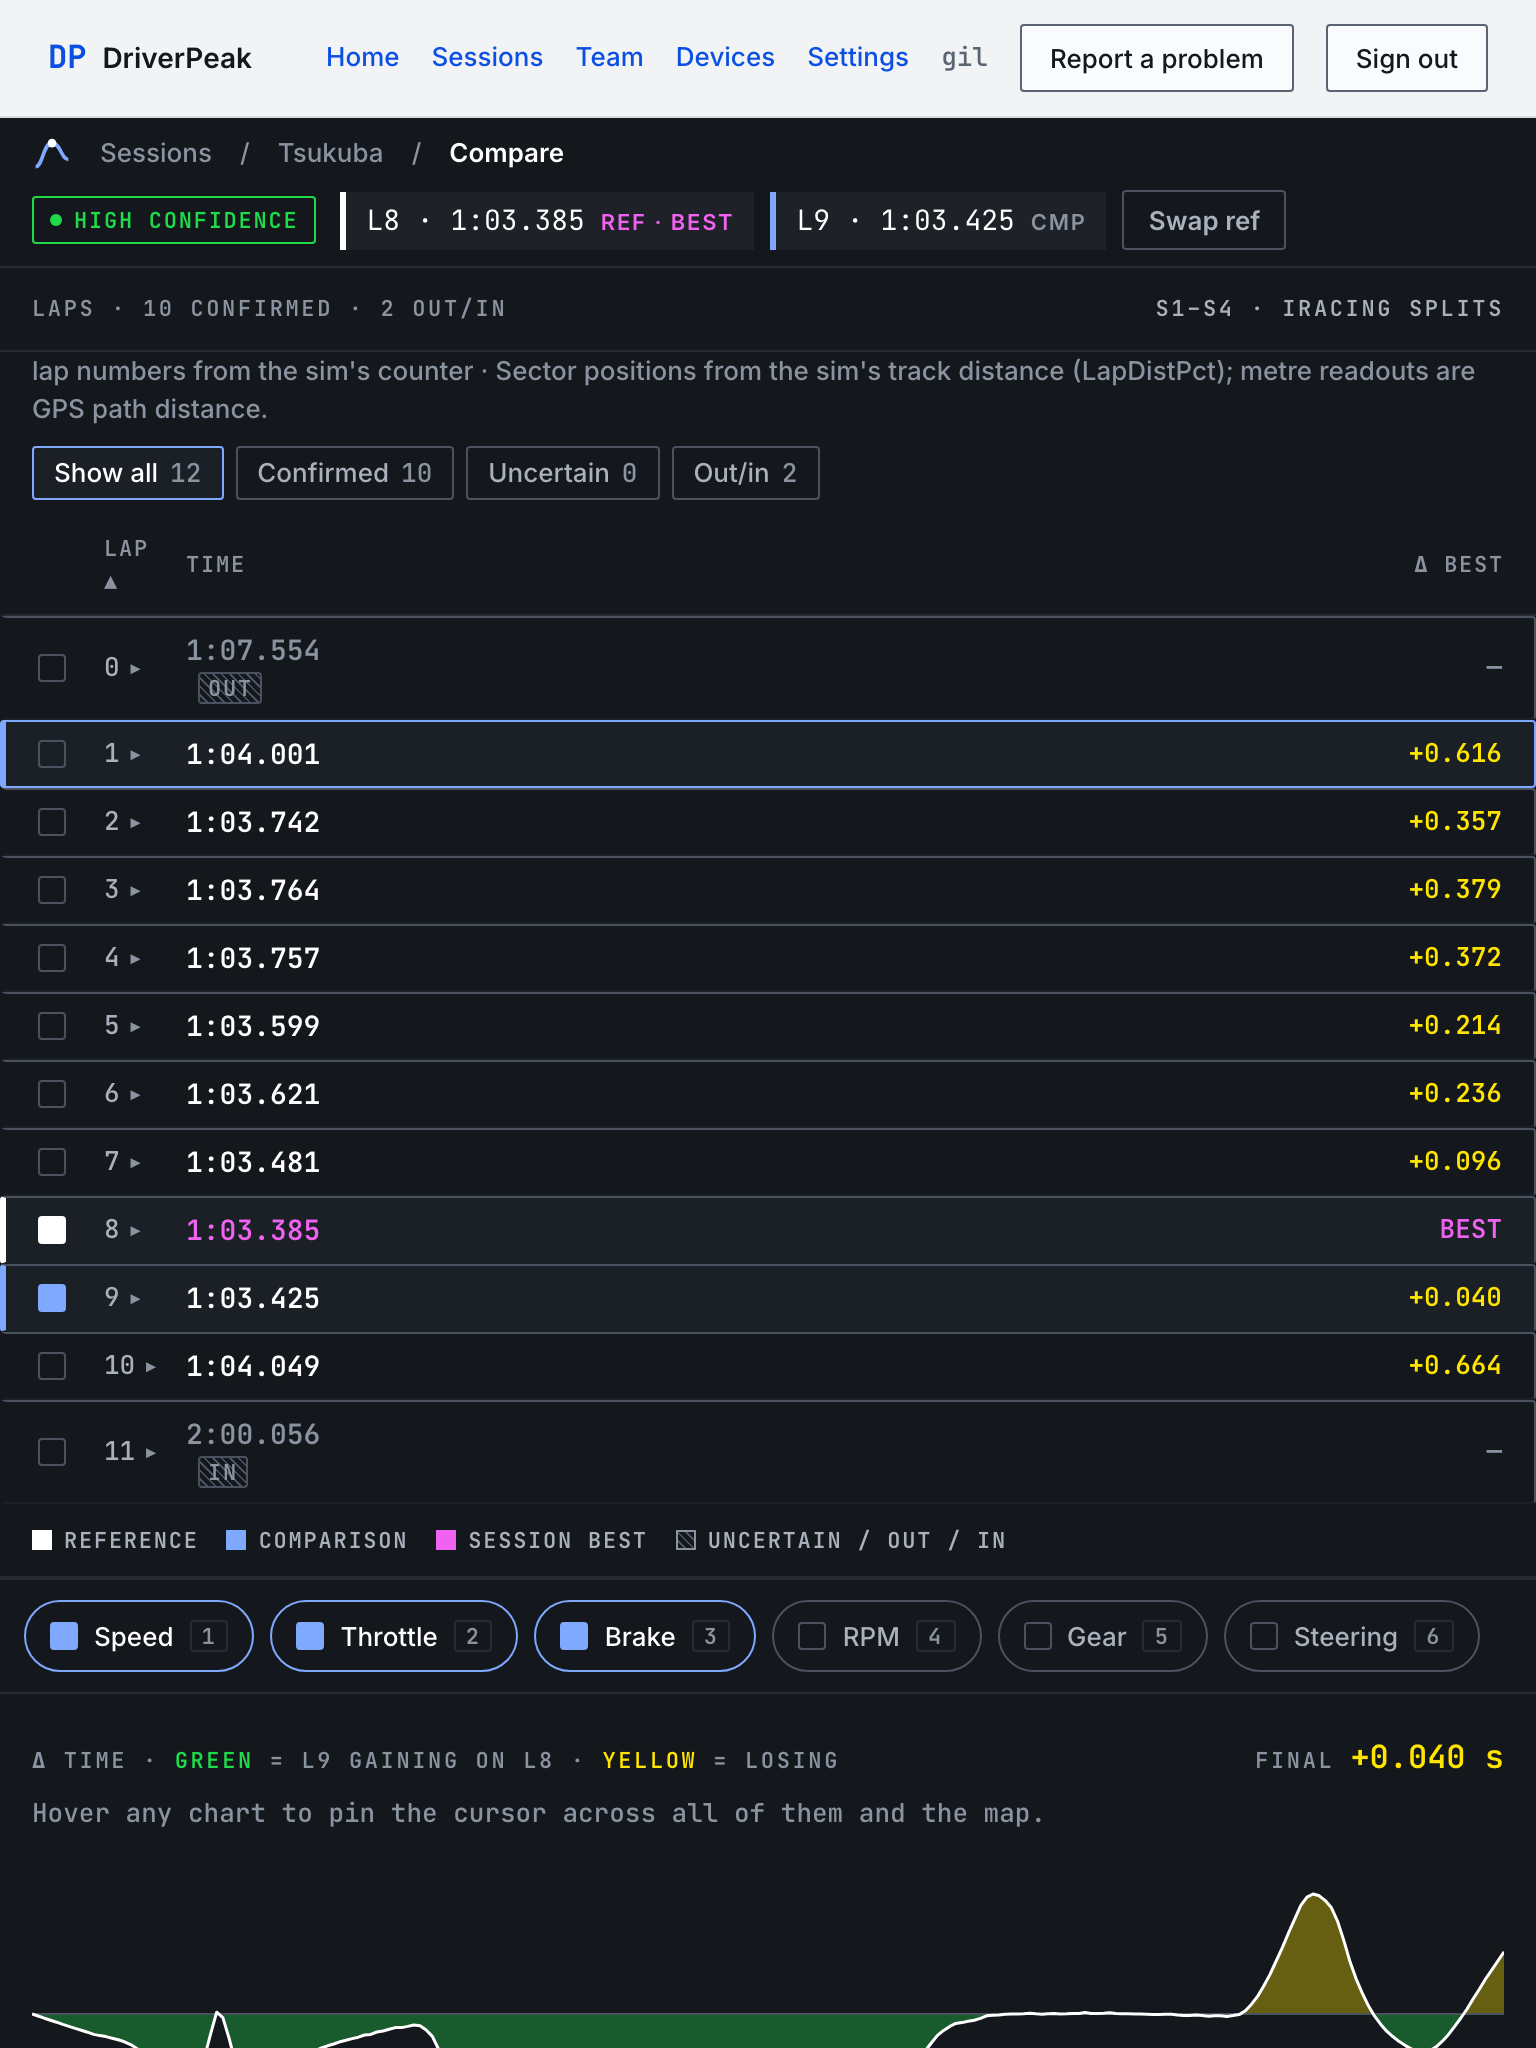
On the session page, check two laps and press Compare (2). The first checked lap is the reference, drawn white; the second is the comparison, drawn blue. The same lap table is on the compare page, so the pair can be changed there: uncheck one, check another. Swap ref flips the two. With fewer than two checked the page says Check two laps in the table — the first becomes the reference (white), the second the comparison (blue).
Note
Both laps must come from the same session; the lap table on the compare page is that session's table. Comparing laps from two different sessions is not available in the app yet.
The delta strip
The strip at the top of the right column is the time gap between the two laps along the lap: the comparison lap's elapsed time minus the reference lap's at the same distance. The header states the convention: Δ time · green = L9 gaining on L8 · yellow = losing. Below zero and green, the comparison lap is ahead; above zero and yellow, behind. Green and yellow mean gaining and losing and nothing else; lap identity stays white and blue.
Final in the strip's header is the difference of the two lap times as lap detection recorded them, not the last point of the trace. The two can differ slightly, and when they do the strip says why (see below).
F1 mode and maximum gain
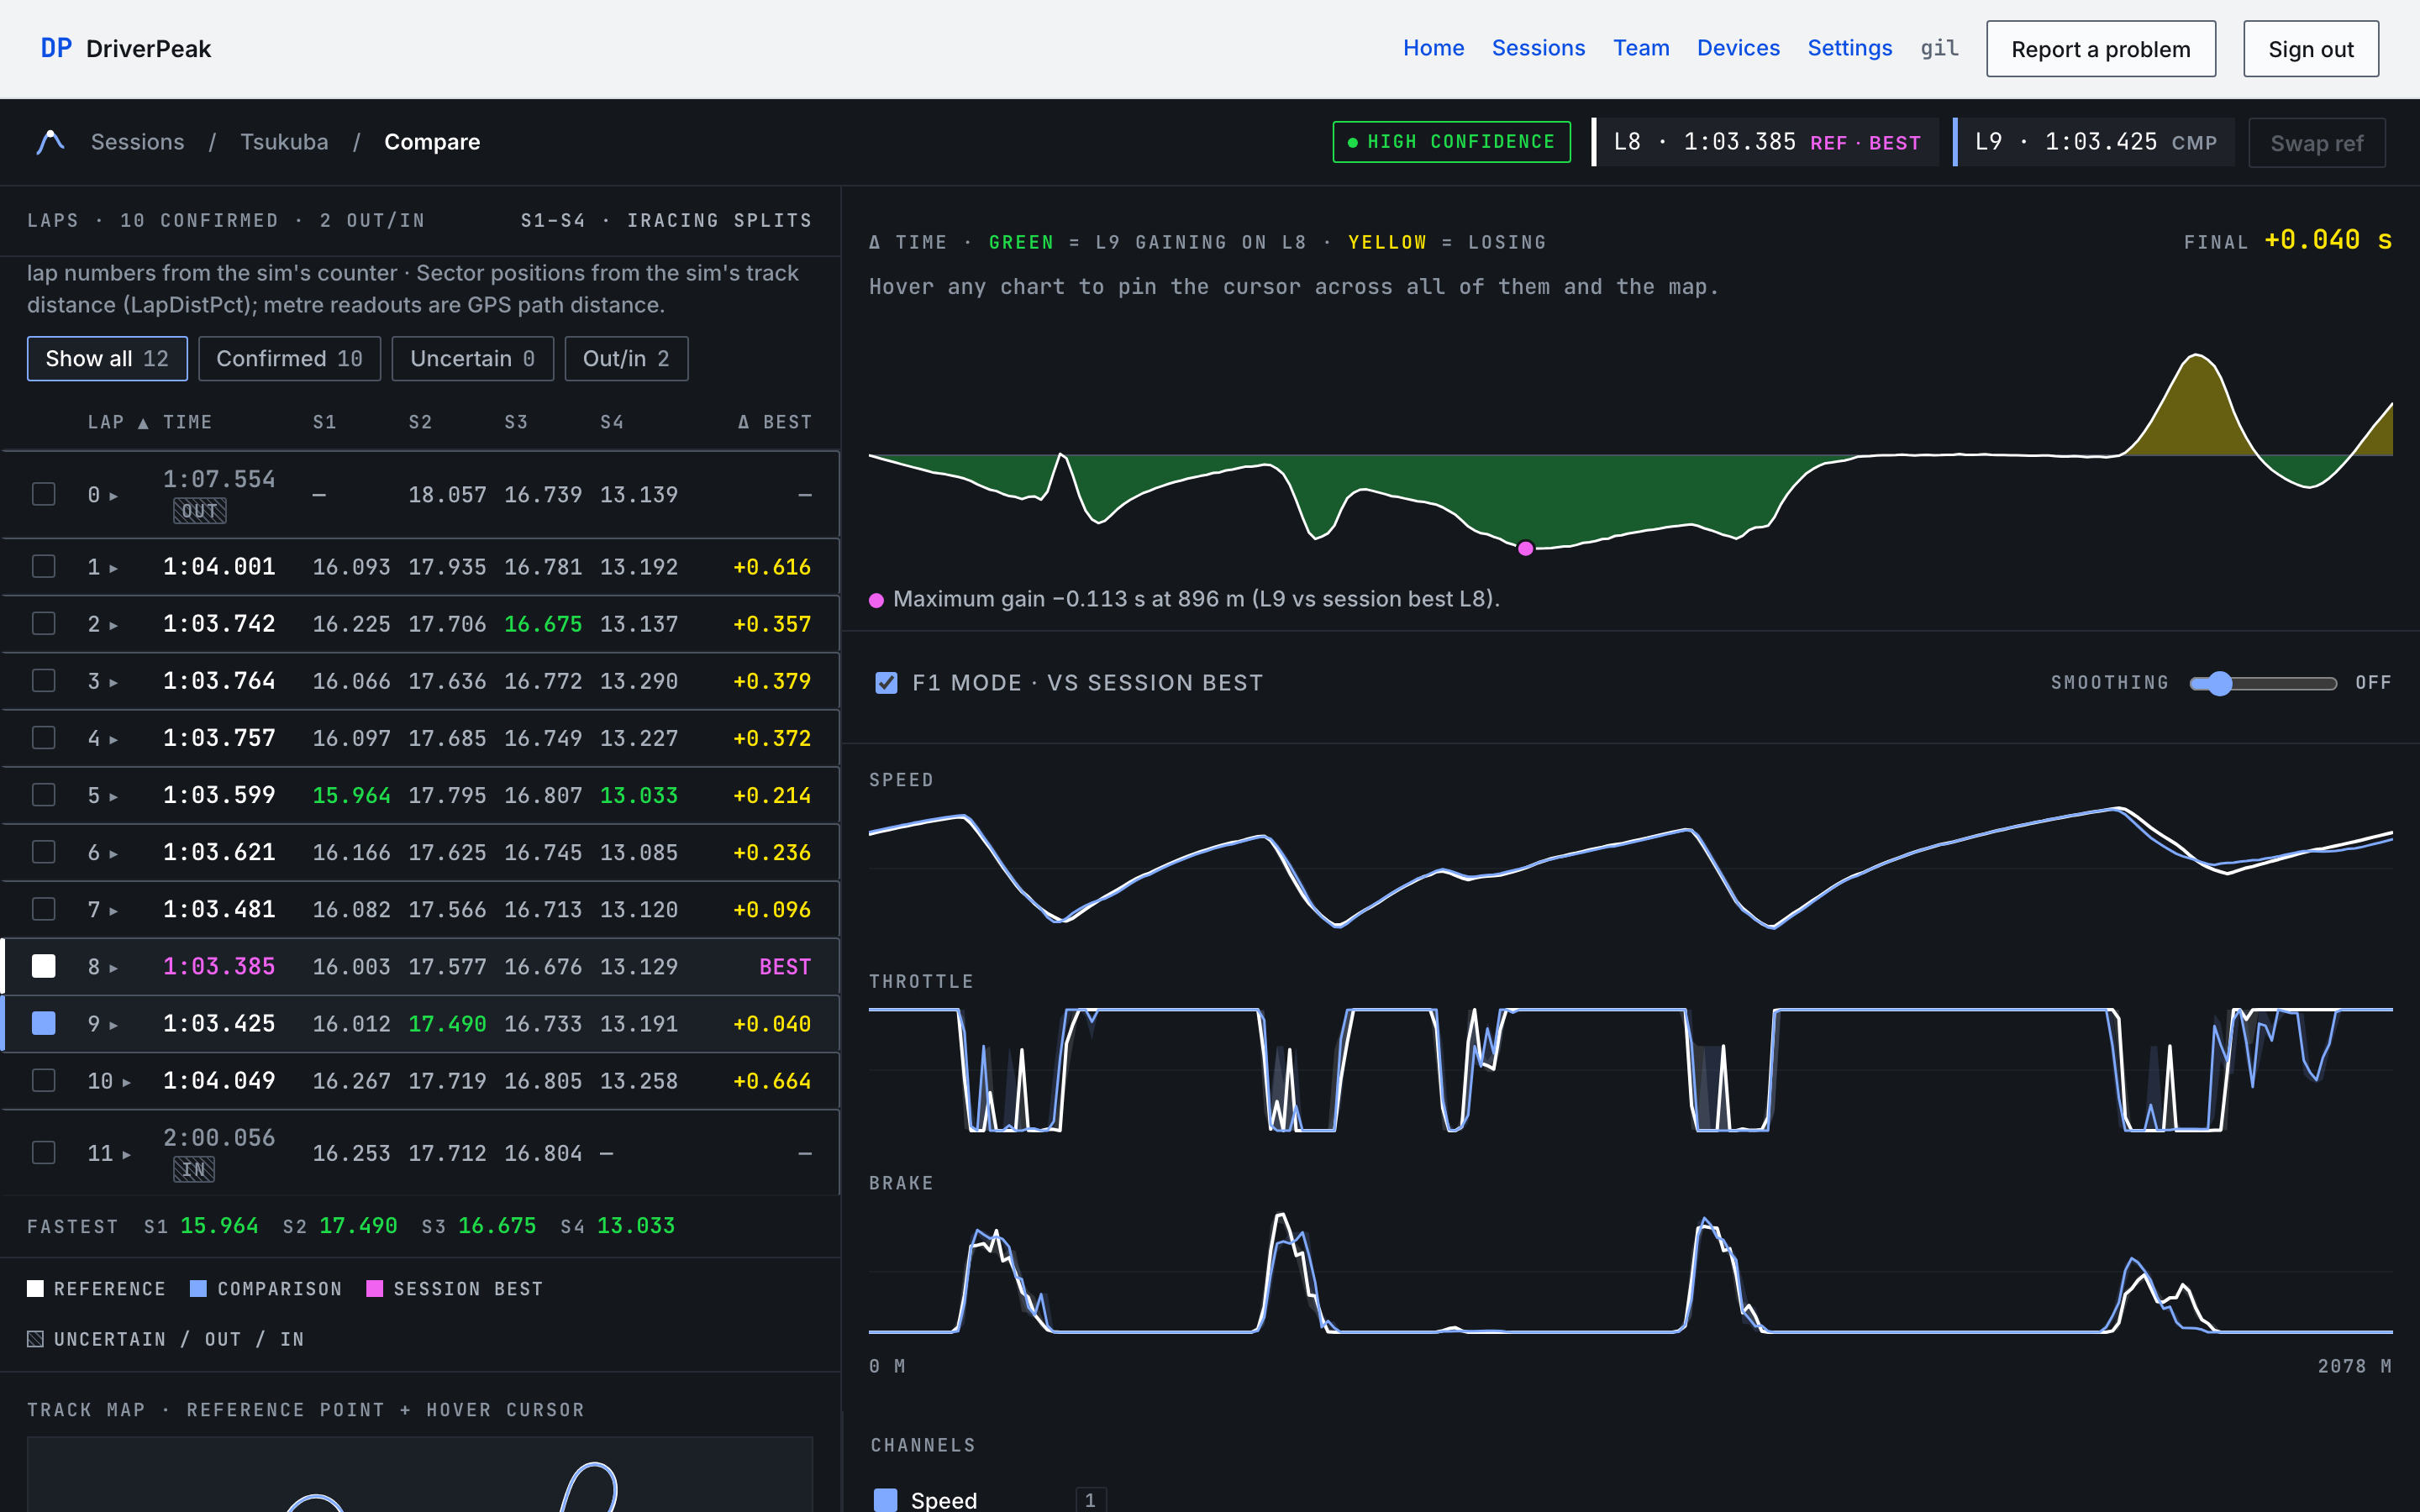
The F1 mode · vs session best checkbox is offered only when one of the two laps is the session's best lap. It pins the reference to that best lap whatever order you checked them in, disables Swap ref, and marks the point of maximum gain: the distance at which the comparison lap was furthest ahead of the best lap, in magenta, with its value in the notes: Maximum gain −0.113 s at 896 m (L9 vs session best L8). If neither lap is the best, the checkbox is disabled and says so.
Honesty note
A lap that is never ahead of the best lap has no point of maximum gain, and the strip says so rather than marking 0.000 at the start line: F1 mode: L‹c› is never ahead of session best L‹r› at any point of the lap — there is no point of maximum gain to mark.
The cursor
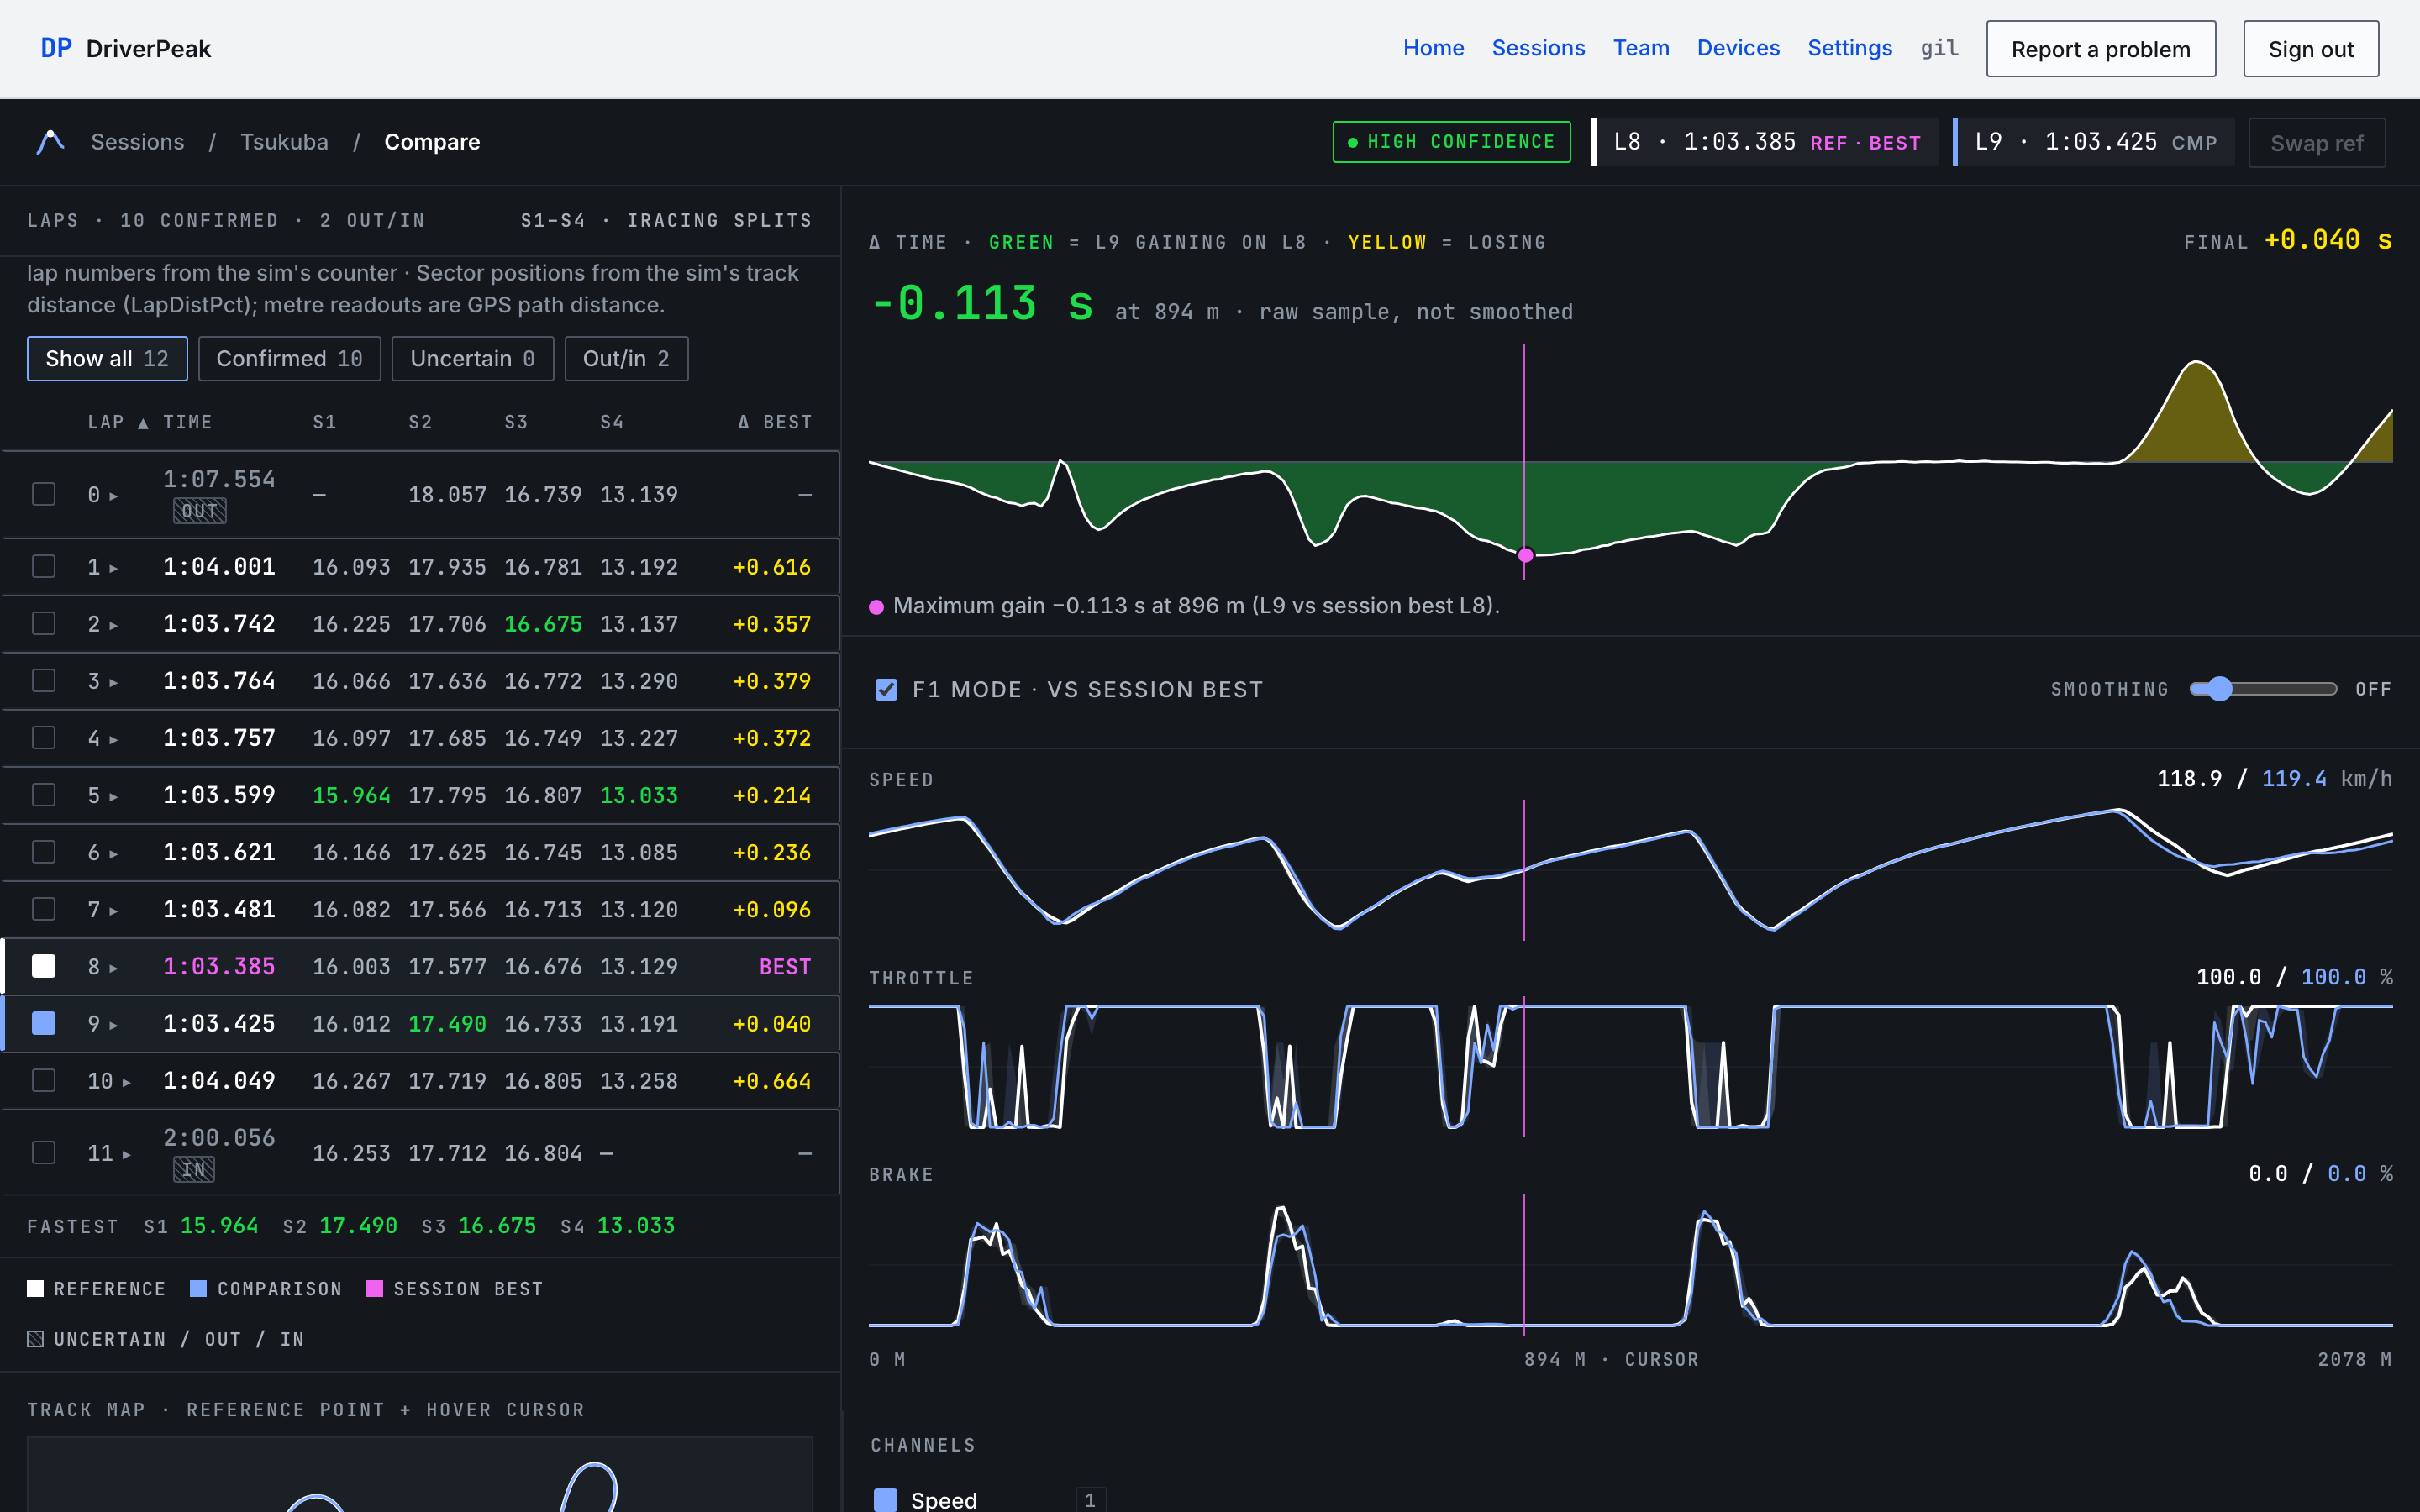
Hover the strip or any channel chart: one magenta cursor crosses the strip, every chart and the track map at the same distance. The strip's readout shows the delta at the cursor, at ‹n› m · raw sample, not smoothed, and each chart's title shows both laps' values there. Smoothing, Off to 9pt, shapes the drawn lines only; readouts are always the raw grid values. The channel rail and the keys 1 to 6 work as on the session page.
Final versus the trace
Two notes can appear under the strip. Both exist because the delta trace is computed on a shared distance grid, and the lap times are not.
- Partial coverage
- When the two laps' data do not cover the same distance, for example a full lap against the in-lap, the shared axis stops where the shorter lap's data ends. The strip says Δ trace covers 0–‹x› m of a ‹y› m lap (shared axis stops where the shorter lap's data ends); the trace's last value is ‹Δ› s — Final above is from the two lap times.
- Resampling
- When the trace's last value and Final differ by more than 0.05 s on a fully covered lap, the strip says Trace ends at ‹Δ› s; Final (‹Δ› s) is from the two lap times — the difference is resampling at the last grid point, not a timing discrepancy.
Uncertain laps
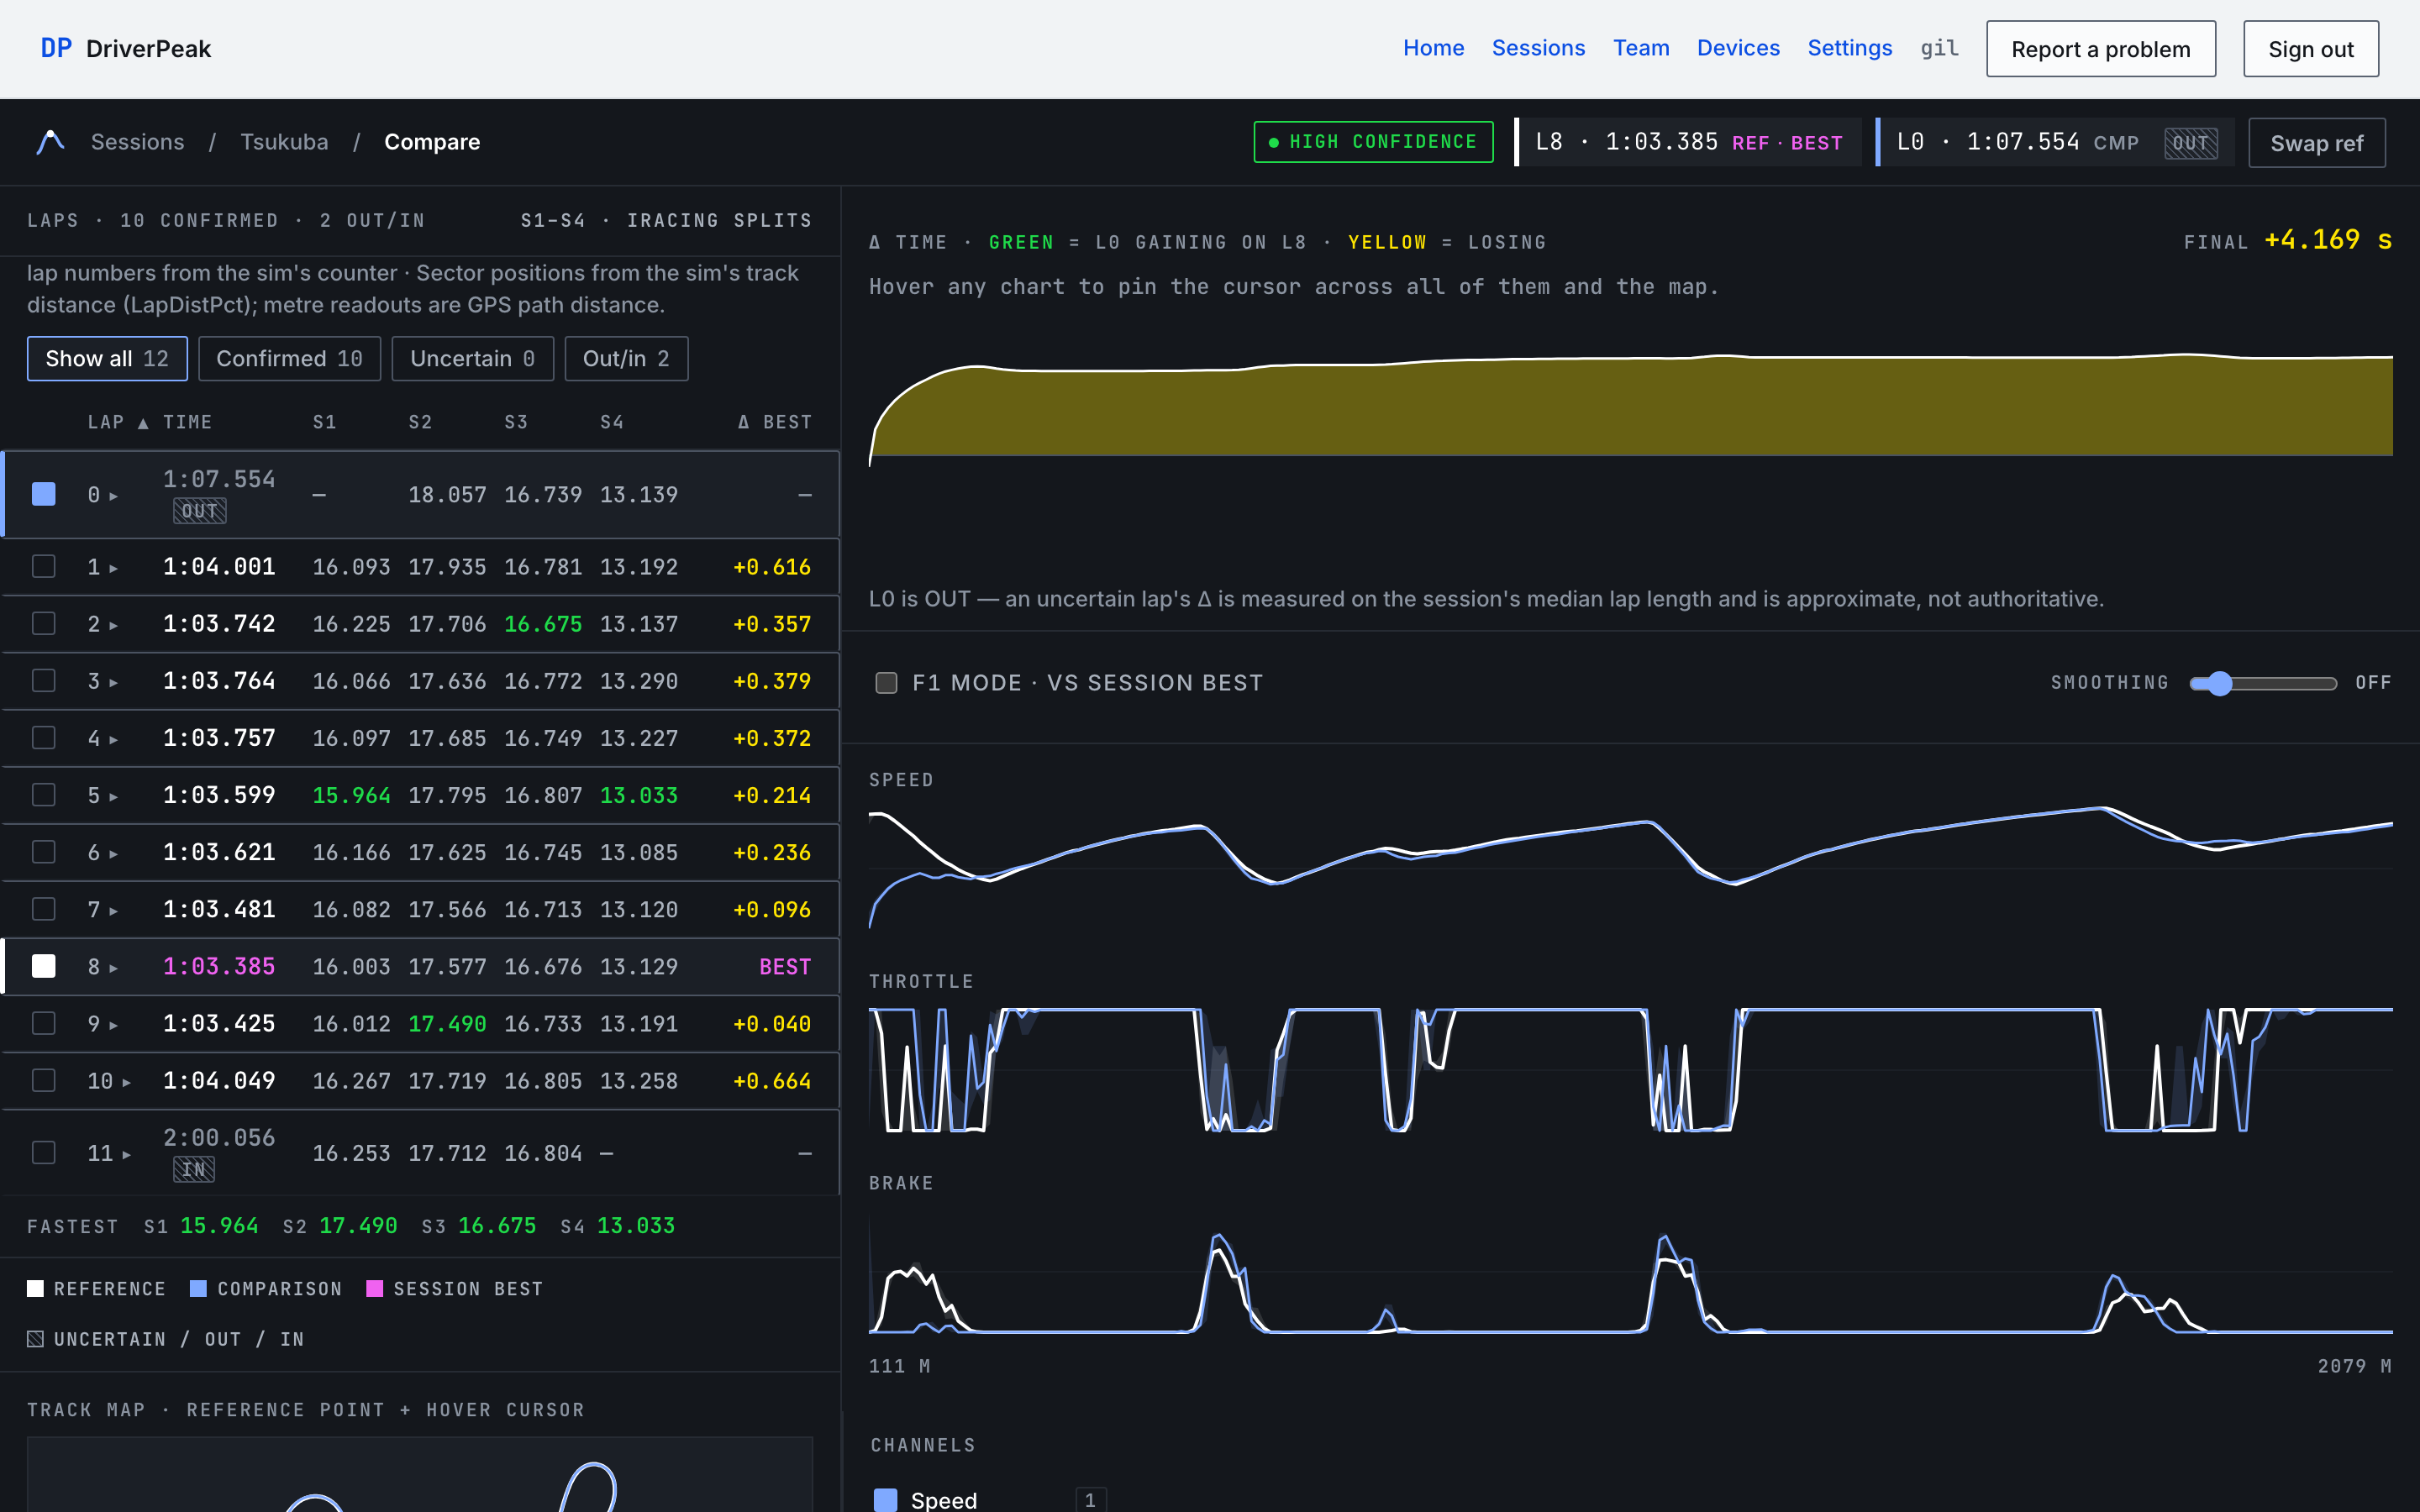
An out-lap, in-lap, unconfirmed segment or invalid lap can be compared; its tag travels with it into the header chips and the strip's notes. Its delta is measured on the session's median lap length, so the strip adds: L0 is OUT — an uncertain lap's Δ is measured on the session's median lap length and is approximate, not authoritative. If the two laps' distance ranges do not overlap at all, there is nothing to compare and the page says These laps' ranges don't overlap on the requested grid — nothing to compare.